Libcode Libcode

  • Home
  • LibCode Index
  • Contact
Home / 10 Stocktake / 10.10 Exporting your Stocktake Data

10.10 Exporting your Stocktake Data

If you have set up a stand alone computer or laptop to do your stocktake, but your main database is on the Server (or main library computer) you can collect stocktake data, export the data in a text file format and then append it to the stocktake on the Server or main library computer.

This comes in handy if your school does not have a portable barcode scanner as you can take the computer/laptop to the actual location of the resources and scan in the barcodes.  You can also view and generate reports to screen (as long as you have some sort of printing device installed, no printer installed at all = no viewing of reports! Give us a call if you’re not sure).

To export the stocktake data:

  1. Load Circulation > Stocktake > Export.
  2. Click on the Export button.
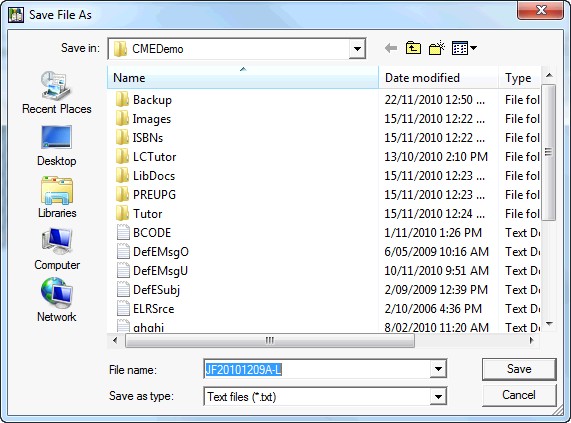
  3. A browser pop up will appear and defaults to the CMEPlus folder (CMEDemo in the example below).
  4. You will need to select the destination drive you would like to save the .txt file to.

  1. A confirmation screen will pop-up so you know when it’s done.

This file can be used to inload barcodes into any LibCode stocktake.

10 Stocktake

Related Articles

  • 10. Stocktaking with LibCode Suite
  • 10.01 Step by step guide to doing a Stocktake
  • 10.02 Stocktaking – Tips & Warnings
  • 10.03 Cleaning up Data for a Stocktake

Categories

  • 1301 Overview
  • 901.03 The Modules
  • 702 Getting Started
  • 103 LibCode Suite Menu
  • 704 Enquiry
  • 1605 Data Entry
  • 305.03 Editing Resource
  • 305.01 Adding a New Resource
  • 405.09 Linking resources
  • 205.10 Adding to the Thesaurus
  • 106 Finding a Classification Number
  • 1507 Circulation
  • 307.06 Extending Loans
  • 407.07 Reports
  • 107.08 Reservations
  • 407.13 Borrowers
  • 007.14 Groups
  • 507.07.04 Returned Loans
  • 207.07.05 Unreturned Loans
  • 1108 Utilities
  • 308.01 Inload-Outload
  • 708.02 Backup-Restore
  • 1108.06 Updating
  • 1008.07 Reports
  • 908.08 Setup
  • 508.06.01 Catalogue
  • 108.06.02 Barcode Record Bulk Updating
  • 808.06.06 Updating Circulation
  • 608.06.06.08 Synchronising Borrowers and Rolling Over Student Data
  • 208.06.07 Culling Records
  • 508.08.01 Authority Files
  • 508.08.03 Circulation Options
  • 408.08.03.01 Loan Period, Loan Extensions & Due Date Overview
  • 109 Junior HYG (Optional)
  • 1810 Stocktake
  • 511 SCIS & CMEWeb Uploads
  • 512 Regular Tasks
  • 213 Support Options
  • 814 Installation, Upgrades, etc

Most Viewed

  • 02.03 Installation Requirements for the Libcode Suite 255
  • 01 Overview – LibCode 6.7.9.0 240
  • 02.02 Methods of Installation 191
  • 02. Getting Started 177
  • 02.01 Before installing LibCode Suite 160

Social

Article Categories

01 Overview (13) 01.03 The Modules (9) 02 Getting Started (7) 03 LibCode Suite Menu (1) 04 Enquiry (7) 05 Data Entry (16) 05.01 Adding a New Resource (3) 05.03 Editing Resource (3) 05.09 Linking resources (4) 05.10 Adding to the Thesaurus (2) 06 Finding a Classification Number (1) 07 Circulation (15) 07.06 Extending Loans (3) 07.07 Reports (4) 07.07.04 Returned Loans (5) 07.07.05 Unreturned Loans (2) 07.08 Reservations (1) 07.13 Borrowers (4) 08 Utilities (11) 08.01 Inload-Outload (3) 08.02 Backup-Restore (7) 08.06 Updating (11) 08.06.01 Catalogue (5) 08.06.02 Barcode Record Bulk Updating (1) 08.06.06 Updating Circulation (8) 08.06.06.08 Synchronising Borrowers and Rolling Over Student Data (6) 08.06.07 Culling Records (2) 08.07 Reports (10) 08.08 Setup (9) 08.08.01 Authority Files (5) 08.08.03 Circulation Options (5) 08.08.03.01 Loan Period, Loan Extensions & Due Date Overview (4) 09 Junior HYG (Optional) (1) 10 Stocktake (18) 11 SCIS & CMEWeb Uploads (5) 12 Regular Tasks (5) 13 Support Options (2) 14 Installation, Upgrades, etc (8)

Libcode

Knowledge Base, Frequently Asked Questions, forums integration and much much more.

Flatbase by NiceThemes © 2025. — Powered by WordPress.